Table and Chair
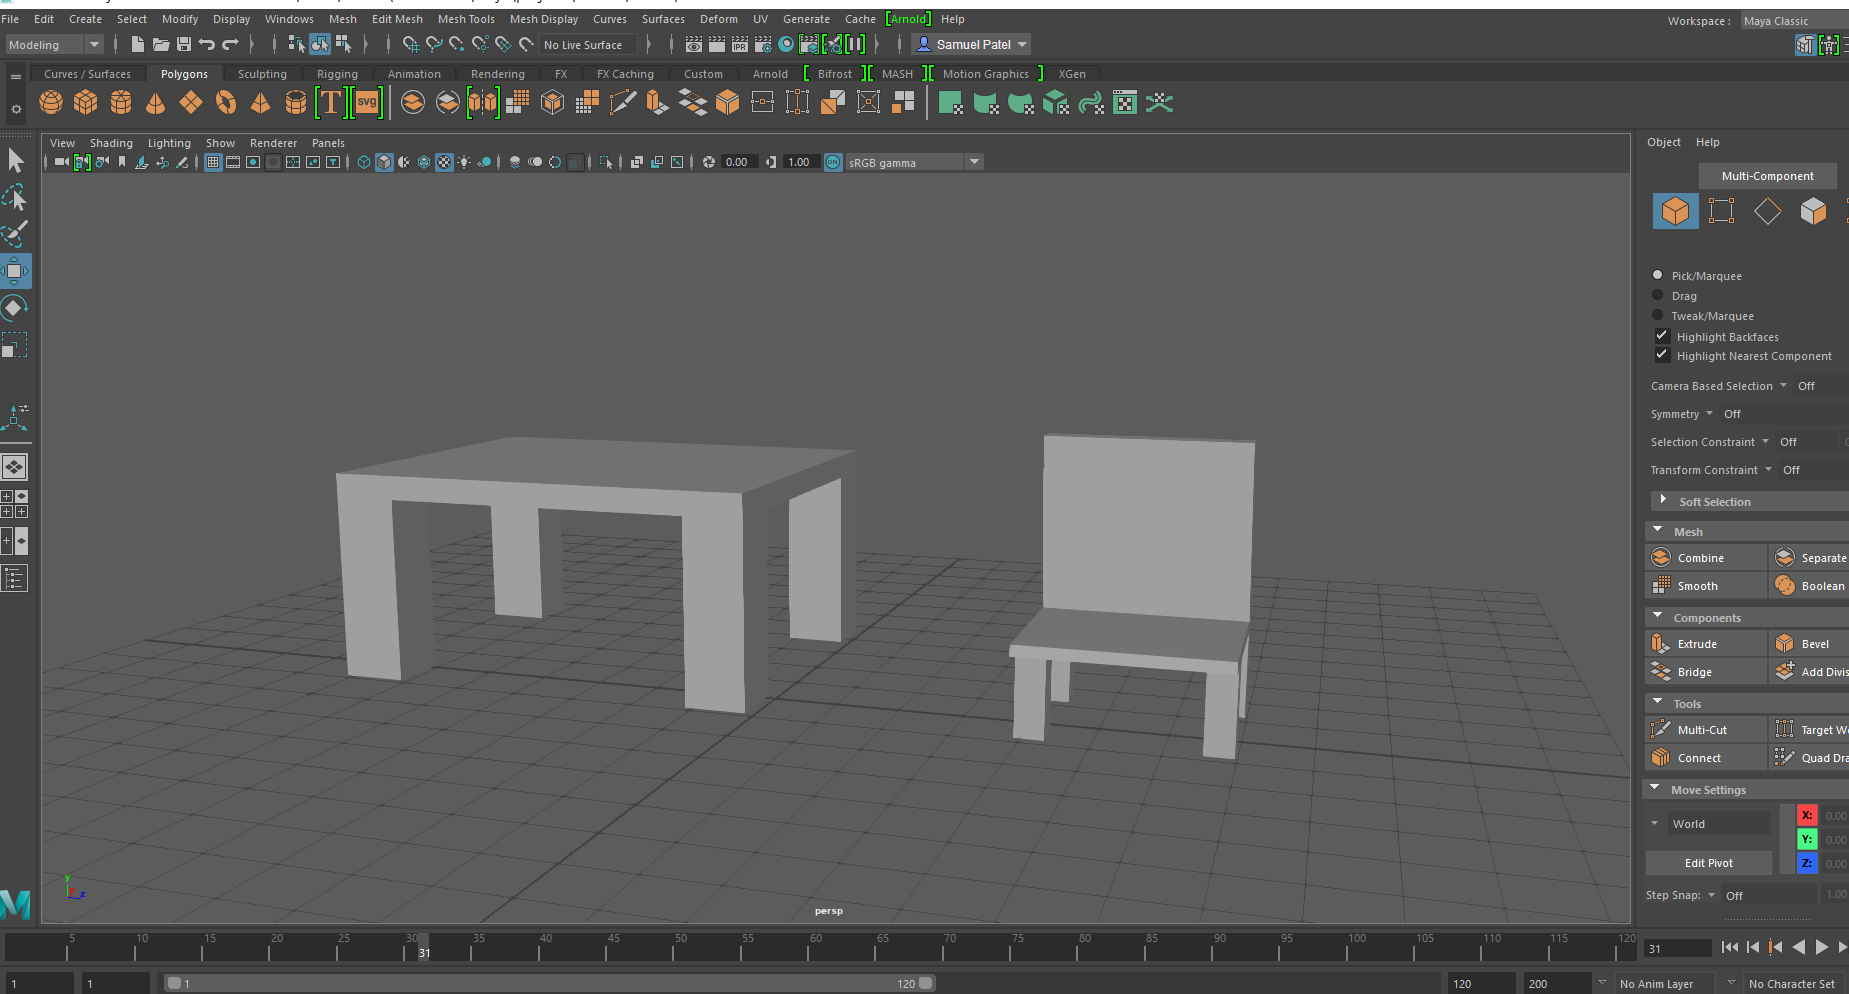
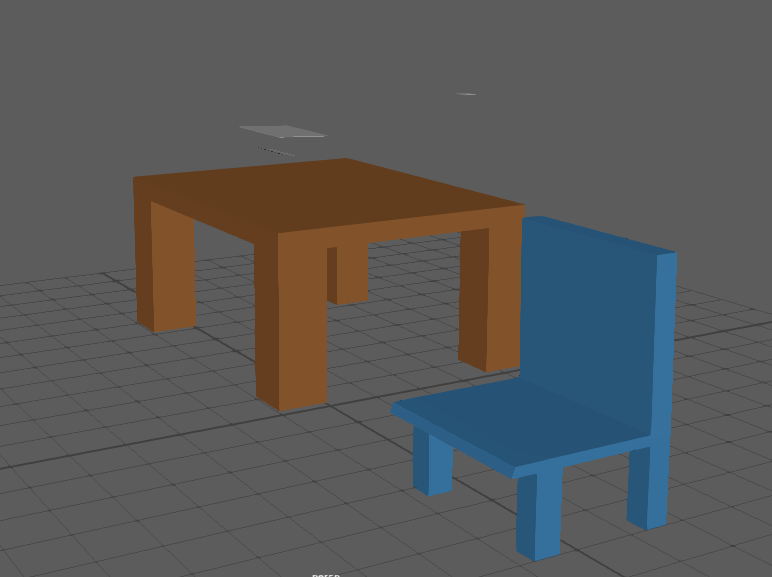
Today we learned how to set up a project and we started to play around with Maya to start to understand to program a little bit more. Our task for the lesson was to make a table and a chair in 3-D. The way that I made it was by getting lots of square polygons together and stretching some of them for chair legs and for the base of the seat of the chair. I made the table first and then I copied it and used it for the chair and just added a backboard using a square and enlarging it. After this, I grouped it together by pressing Control+P.
7/09/17
Robot
Today in the lesson we were told to make a robot using the simple shapes that are already there in Maya. Before we started we were told that we had to do concept designs for the front, side and profile view. Once that was done we started on making the robot. As this was the first time using Maya, it took time to get used to it, for example pressing space changes the view and having the buttons on the side for moving, enlarging and rotating. When making the robot I clicked on a button that allowed me to have 4 panels to look through: front view, side view, a top view and a perspective view. These were very helpful since it allowed me to make sure everything was in place from all points of view.

After this, we had to click on the 4th option to bind the joints to the skin this way when we move the joints it will move the part of the character's body. From here this when I started to make the walk cycle and I found it a lot easier to make this way and it wasn't too complicated because you just move it to where you think it would be right and then press the S key on the keyboard and this allowed me to make a key-frame for the animation.

Today in the lesson we used an already made model of the human body. We used this model to learn how to rig the body using joints. We also learned how to auto-rig through a button that does it automatically. When it does this, it gives Inverse Kinematics. Inverse kinematics are different to forward kinematics because the inverse kinematics gives a natural feeling and look to the animation when the joints move. Forward kinematics is not as smooth and it makes the movement look jagged and robotic. After we rigged the character from making the joints I skinned them to the model so that they were both together so when I move the joints the model moves and when I move the model the joints move.
Teddy Bear
Today we got the task to make a teddy bear. We started off by getting a cube and then selecting the face and then clicking the modeling toolkit. Then we used the extrude tool. to create a head, arms, and legs.
We learned how to box model. For this lesson, our task was to model a bear and to use a square polygon as the base and to extrude to faces to make the bear. I think this was hard at the start but I lost my work and then when I made it again I found it a lot easier. Also, there was a tutorial to show how to use the timeline editor but I didn't see it because I know how to move the key-frames as well how to make them. After I finished the bear I had to do Inverse Kinematics. Inverse kinematics gives a smoother feeling to the animation and instead of moving every joint individually you can main joint and control the others with it. When started to create it I did it wrong and did forward kinematics then I changed it to an Ik handle. After all the joints are created for the bear then I highlight the joints and the bit of the bear's body and then I skin them together.
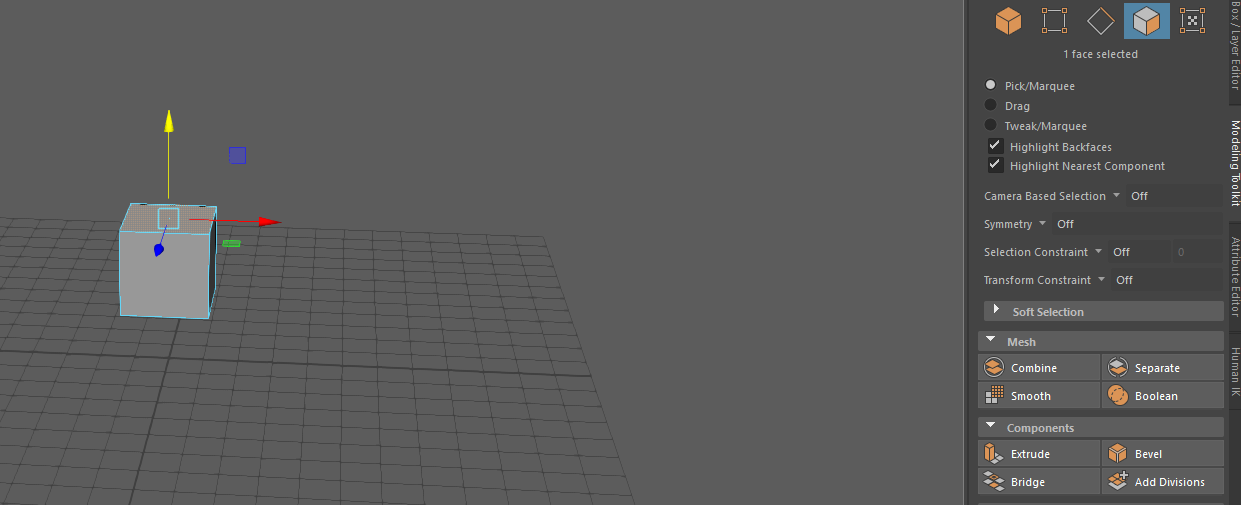
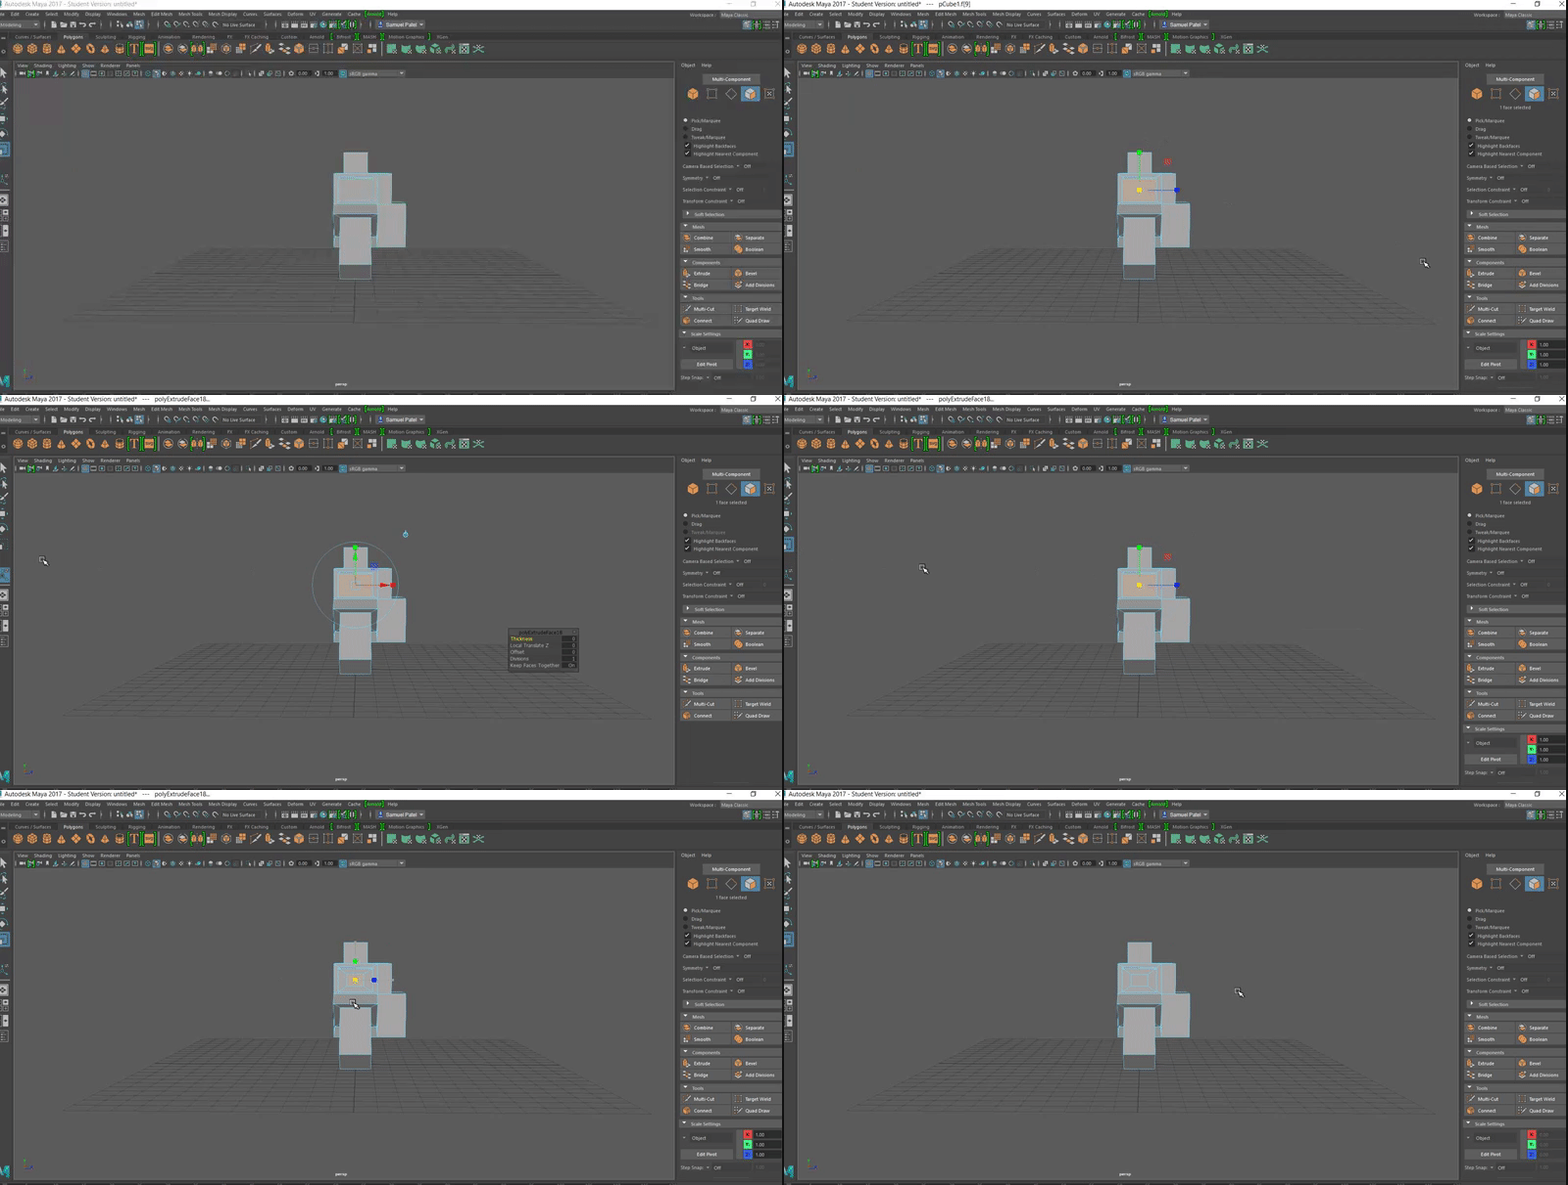
I used the extrude tool to make make the arms and the legs and the head. When using the extrude tool I extruded the face itself before extruding it out to make the arms and the legs different sizes. This way I can make different shapes. Also, I decided to use the extrude tool but I decided to rotate it so I can make the legs different.
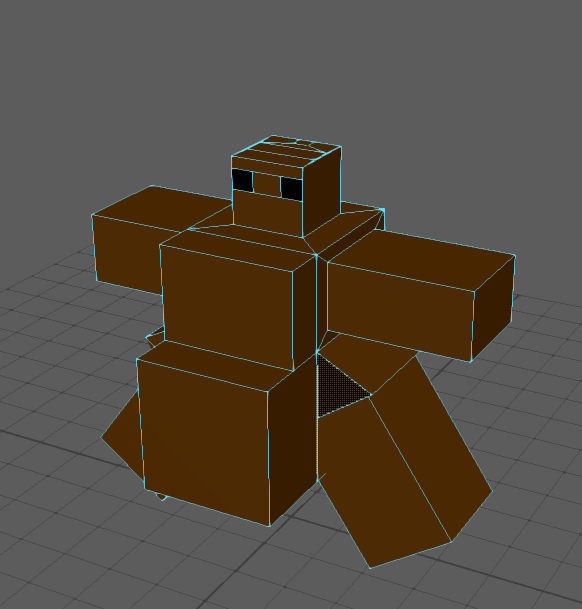
After I finished the modeling for bear I decided to color the bear all brown and I am going to also give him eyes that are black.
Lamp
When I made the lamp there was a tutorial that was provided. The process was pretty easy to make it, the way I made it was to get a cone polygon and to delete the base of the polygon cone. Then to add a sphere for the bulb and smaller spheres needed for the joints of the lamp and finally some cylinders to hold the lamp. I gave the lamp inverse kinematics because we had to animate it and give it movement and our inspiration was the Pixar lamp at the start of there movies. I had a problem because I didn't add paint weights to the lamp it would then begin to stretch if I moved it too much but it was okay because I was still able to animate it without people being able to see it stretch.

Quad-draw Dog
In this lesson, we started to learn about the Quad-draw tool. We had to use this tool with a picture of a dog and quad draw it. The way that it was done is that we got to add points and then after when there are 4 points you can select it to make a quad with that and that makes a single face. We did this how the whole dog aligning vectors and then connecting them. I had an issue as I got to the end because I started to get triangles. Triangles are bad for animating and so I had to delete an edge to make sure that I could not get a triangle and get only quads. After this, you press enter and it pastes the shape and then we extruded it to make it thicker. There were 2 ways to extrude the faces. One way is to go to modeling toolbox and then there is the extrude button and the other way is to hold left shift and left click and the option extrude will come up. After the dog was extruded the legs were still not cut so I had to use the Multi-cut tool and this allows me to place vectors in a line and when I'm done I press enter and it puts those vectors there. After it goes in a loop I cut it and they are left with the gap between the legs. Here is the final make of the dog.

I had problems with the back leg because of an indent that has been made also because of the tail. The indent stops me from doing the inner leg and the tail stops me from doing the back of the tail. So next time I think I should put the tail higher. Another thing that I had to do was bridge the edges for leg together so it properly forms or then it has a gap in the side.

12/10/17
Debate
Today we spoke about games and we had a group discussion whether video games are good or bad. We looked at the politics, economy, crime, personal lives, and popular culture. Arsalan, Christyn, Ryan and I mentioned a few things that are positive and negative about video games.
Today in our lesson we had a debate about manga and anime and how it has the effect of violence. Before we had to do some research for this. But I didn't but since it was meant to be for 3 people debating against another 3 people I didn't think but after I got chosen to talk. When I got chosen the teacher asked me if I did any research and I did but I forgot it and because of that I decided to improvise. The points that I thought of was that you can't blame anime for incidents that happen in real life, because first of all most anime is not usually realistic. They mostly follow the genres of Comedy, Sci-Fi, and Fantasy. I thought that was a very strong point because anime has a story as well as that it has a point to it and what its intention is.
Fairy Tale
We had to do a short fairy tale animation but with a twist. My Idea was to have Humpty Dumpty and he falls off a wall but instead of him cracking he hits the floor and doesn't break. He melts in the hot sun because he is not a normal egg he is a chocolate egg.
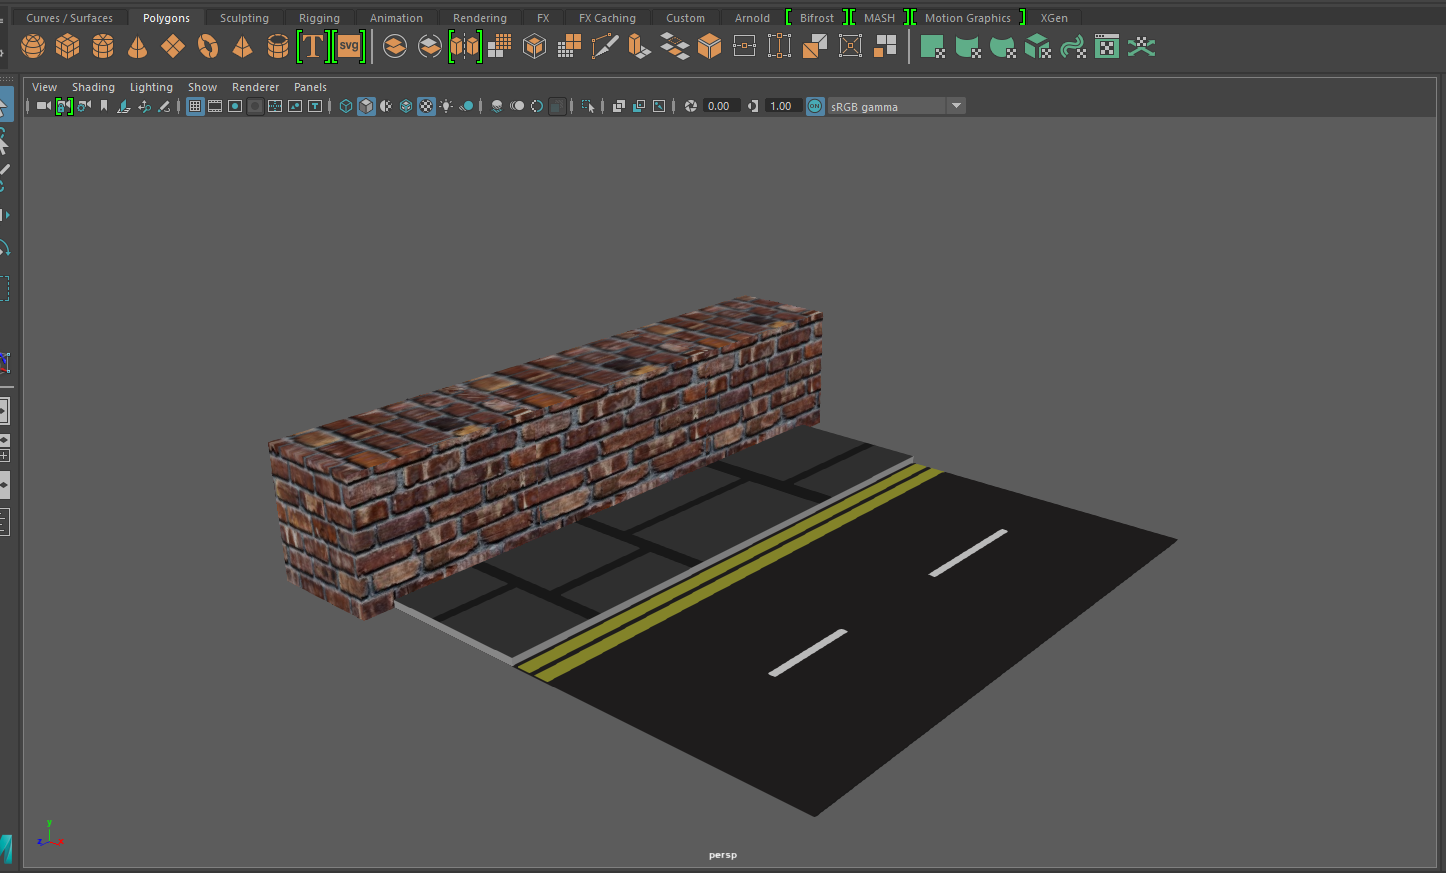
Here is the road that I made for my animation It took longer to make because of all the divisions that had to be added. The brick wall is 3 blocks put together with a brick texture.
This was the basic environment that I made for the animation. All the lines for the pavement and for the road I made them using Edge-loops this took quite and after that, I colored it using the Lambert.
With the concrete I made a curb and to do this I got the vectors and then dragged them down. and to create new vectors I had to add more Edge-loops.
Blend-Shape
We today learned how to make a face do different faces without having to rig it. The way that we did is make a few different faces with the same topology. After that, I changed the facial expressions that the faces were making so I made a happy, sad, surprised, angry, neutral and a wink face. With the tool, I can blend them together and then there are sliders which let you change the face to the percentage of the slider that you move.

Pre-Production
First off in the pre-production stage I did the project proposal. Here it is
Name: Samuel Patel-Christie
|
|
Social Issues: Drugs
|
|
Pathway (Preferred Media ‘specialism’):
Games development and Animation. What are you going to make and create? Write an overview of your idea and the issue you would like to address.
This may be a combination of one or more.
|
|
I’m going to model a Marijuana leaf and then also make a medication pill and intend to put some voice acting (Marijuana leaf- “I’m bad for you don’t smoke me or dink or eat me”) I want to highlight the harmful effects that Marijuana have. (Medication pill says that I’m good for you and I’ll help you get better, from being ill.)
|
|
Section 1: Project Rationale (approx. 100 words)
How can you use one of your skills on the topic you are studying? How does what you know now influence your choice of the pathway and your project proposal? Who are the animators and game designers that you like and how have they influenced you?
Relate to
Critically describe a range of contextual perspectives influencing a chosen discipline in creative media production.
|
|
I have learned a lot in Maya and I know one of the tools that I will use is the quad tool. That way I can draw the Marijuana leaf out. I’m planning on doing a 2-D digital drawing that way I can use that for my character. For the medication pill, I was planning on drawing a pill diagonal with some legs to make him stand and have a split in the middle so he has to 2 colors so people know that he is a pill. For the pill, I won’t be using a quad-tool. My two artists are Jenny Savile and Bryan Lewis Saunders because their work both relate to abuse and drugs. Jenny Savile’s work is not directly
|
|
Section 2 Project Concept: (approx. 200 words)
Identify a range of relevant academic and cultural sources for a personal research project.
Clearly explain the concept and aims of your project and the context, research and ideas that will support its development. What are the historical, economic, social, mass media, cultural, political influences?
What is it you want to communicate and who is your audience?
|
|
The Concept of my animation and what I am planning to do is to raise awareness of the dangers and the positive things with Drugs in general. This is because lots of people do drugs without knowing the repercussions. To first show what bad drugs can do to you and have the bad drug ( a Marijuana leaf) talking and saying the bad things that the drug can do to you (depending on what the drug is). And then other Drugs that are good for you that have good effects and maybe how they can solve the problems that a bad drug could have for you. I’m plainsong on having a few of these characters. Like for example crystal-meth (Methamphetamine) so just draw some crystals and give them some eyes. I’m Going to have some voice acting done maybe from some class members and color them. If I do that this means that I have to have the voice recording first that way I can animate it so the medication or (bad) drug is speaking. It’s not going to be too long I’m thinking that it might be like 30 seconds to perhaps a minute. How I got the Idea was that I said to my teacher that I was going to do drugs and she said as a joke “are you going to make the medication say that he is good for you and that the weed is bad for you” and because I was going to include weed I took this idea.
|
|
Section 3 Evaluation and Reflection: (Approx 50 words)
1. Critically evaluate information from a range of sources to inform ideas.
You will have to gather primary and secondary sources. Research articles and find sources you can sight with quotes and references.
2. Effectively communicate ideas in appropriate formats.
3. Explain how you will reflect on, and evaluate your work, as both an on-going activity and at the conclusion of the project. You should describe how you intend to record your decision making and how you will document changes to your ideas as work progresses. (BLOG work)
4. The evaluation should be referred back to your aims. It must be reflective (‘why? Because?’) and analytical rather than a description of actions completed.
|
|
So I can use my Blog to evaluate my work also I can ask the teacher for their opinion and get 1 to 1 advice from them. I can refer back to my research and use this to make my animation factually and accurate.
|
|
Section 4: Research Sources and Bibliography
Record the initial research sources, both primary and secondary, that you intend to use. Your sources of research should be as wide as possible, including libraries, museums, galleries, journalism, articles, media, galleries, books, film/video, magazines, TV/radio programmes, websites etc.
You must also record visually with screenshots, primary drawings of environments and characters, model making and or still photographs, scanning, and paper or computer-based drawing.
|
|
I will be doing a Questionnaire to see what people know and think about drugs. This way I can see people’s knowledge and see if people have any knowledge about medication or drugs. It is good if people if people don’t have much awareness and don’t know too much that way my animation will teach people something new and have meaning. This is my primary research my secondary research will be looking up facts not to complicated to see if people know them for my primary research.
http://www.unimedliving.com/living-medicine/medicine-and-living-medicine/what-is-good-medicine.html
|
|
Storyboard
Concept Art
Character concept art
I have started to do the concept art for my character. The design that I did is very vague but I have plans for when I model it. My idea is that is that I plan to do the top half when modeled in high detail, this is because of the time that there is and also the right that I make will be easier to do as well as paint weights. I was wondering whether or not if I should rig it or shape blend. The differences are that the rig and paint weights won't take as long although I might have to do both. Another thing is that I didn't really design clothes on him because I'm planning on putting bad clothing on him to show that he can't afford many things. I think this helps because a lot of people can judge from looking at him his status and his wealth. I felt like that I should have given him hair and the only reason why I didn't think about hair is that I feel like it will be more time consuming but it's a lot simpler without hair. Also, I feel like giving him a muscular or lean body makes him look like a thug more and that the vibe that I'm trying to give the viewers.

Object Concept art
For the object concept arts, I did the main objects that will be in the animation and not every single object.
ATM
I drew an ATM For my concept art since this is one of the main objects as this is how the main character receives his money. I changed it so that is has a different art style and made it look different to the ATMs that you might see today. I did this by because it doesn't look formal and professional.

I think for I could have made the line better as some of it is darker and some other lines are lighter. I did this so I could define so of the buttons or slots. I think the shading should have been done properly because it makes it look really rough and it also doesn't look really nice since its rough. And because of the art style, it looks like this is a dodgy ATM, although I think that is a good effect since it is being used to buy illegal goods.
Spliff
Another item that I did for the concept art was a spliff this which is a roll-up but, they have different names for the way they are rolled up. And I did a spliff since it makes it more obvious what it is and so people who are watching without knowing the context would understand. This is what the main character will roll up and then smoke as he goes to the ATM.

When doing this I made sure to 2 different drawings that way you know what it looks like when it is being smoked and when it is rolled up. I also colored it so that you know that it gives more of an idea of what it is. I think that before coloring it that I should have colored the paper that way it would look more colorful and it wouldn't look plain if I did color the papers I would have colored it a light grey color. I think that the drawing of the spliff is really accurate although I'm not sure if people would know what this is if they had no knowledge about weed and roll-ups.
Bag of Weed
This is going to be one of the main objects that he will use but it will be seen only briefly as the character rolls this up to make a spliff.

Instead of having the weed as rocks I was thinking that I should have it already grinded up this way it will be easier to animate and I think that it will make the animation longer but for an unnecessary reason. So having it ground it up will save time although there is the fact that to consider that people might not know what it is at first until its being rolled-up, especially as there are things that look similar for example oregano.

Environment concept
This is the main scene that will be shown. This is the characters house and this is where he will be rolling weed and then after that, he will leave his house to go the ATM because he runs out of drugs.

I think that I could have perhaps colored it in and then add more to the environment and add flowers and maybe trees to make it more lively, or could have added some trash on the floor or maybe made the floors or house ruined a little this way it would have made it seem that he lives in an urban area.
Social issues - Drugs
On this topic I have been modeling things for the animation, I started off with the house and the and the texturing since I knew how to do it because of my last animation. As well as this I have also colored the door that I have made for the house. One Issue that I had is that one of the walls the brick texture isn't done properly and I don't know to change it since I have combined it with the other walls since I made all of them separately.
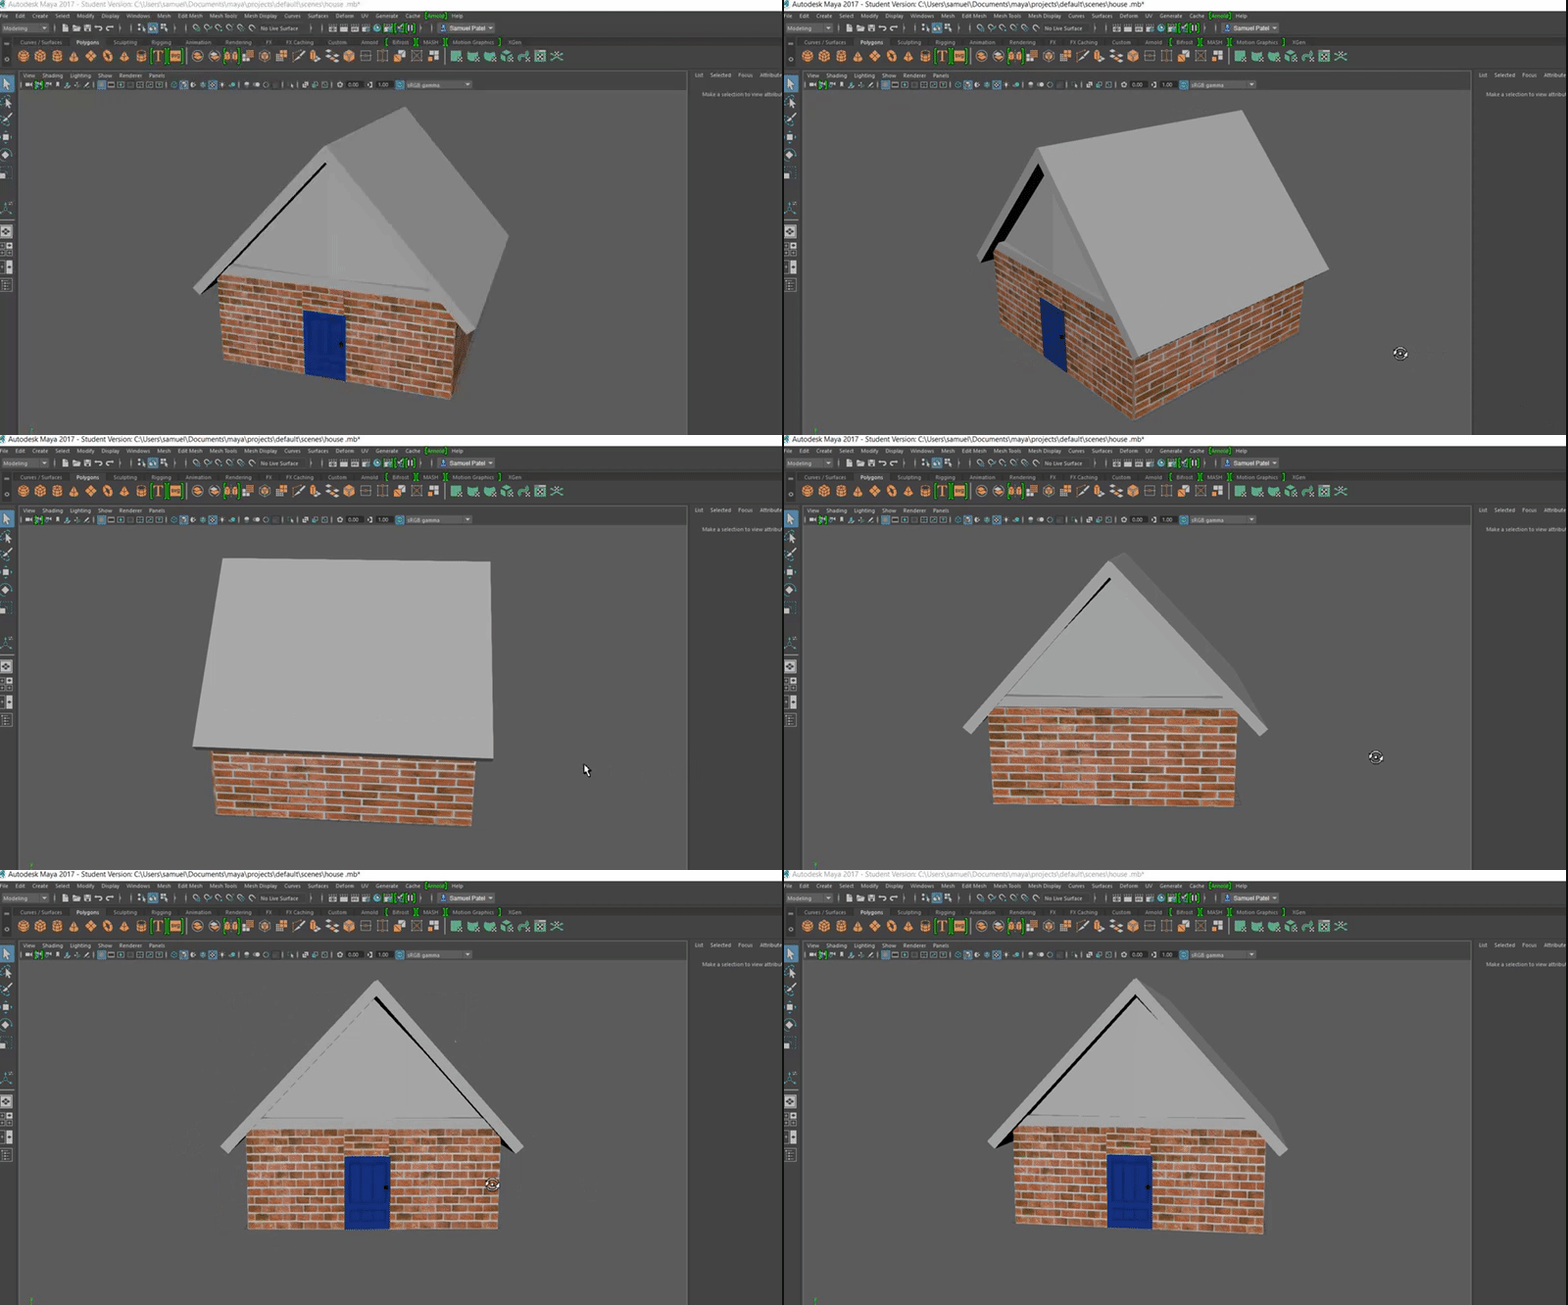
After this, I have made a chair and a table and right now I wanted to make lots of things in this house, but I want to make sure that I model the relevant things so that the animation has all the assets for it to run. I used a Brick texture that I found on the internet and it was a picture of just bricks. I decided that it would be easier to use a texture then create texture since I didn't know how to create it and also it takes up a lot of time. For the door, I textured it blue and then used the edge-loop tool to make the dents in the door to try and make it more realistic. And for the door handle I textured it black I used Lambert because I wanted it to be a matte color.
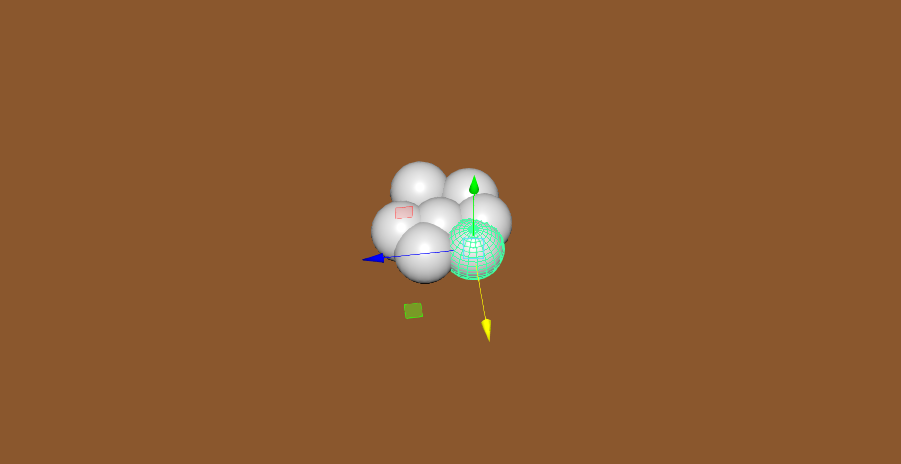
After this, I started to make some of the drugs. and I started to make the cocaine and because I didn't really know how to model it so, I decided to make lots of small balls that are white and I'm planning to put it together to give the effect of looking like cocaine powder. As for the texturing for the cocaine, I decided to leave it a simple white and make it really small so people know what it is since it is meant to be an ice white color, which is just a really bright white. For the table and chair, I textured them as a simple matte brown and blue. I think when it came to texturing maybe I could have used more different textures or make them look nicer. For example the wood texture I could have made it look more like wood.
I started to model my character starting from the face. I wasn't too sure how to model a face since I have never modeled one before. I got two reference photos from google and put them on the image planes. To do that I went to the create option and then after that clicked on polygon primitives and then there was an option to select plane. After that, I put the plane right in the middle and duplicated it with the short-cut Ctrl+D. and then I rotated it so that it looked like a plus sign. After this, I decided to put the references on and to do that I right clicked and then selected assign new material and selected Lambert and from there I could change the color to a file and then I selected my reference materials. When that was done I moved them far away and selected both of them and put them on a layer together and put them as reference material. After this, I started to look at a Youtube tutorial showing how to model eyes and the mouth. To start I created a cylinder polygon and changed it so that it had 2 subdivisions and that it only had 12 instead of on 20. After this, I duplicated it and put one of the eyes and one over the mouth. In the tutorial he has the shapes on a wire frame and I didn't know how to do that so I put them on a different layer and then right clicked on the layer it was on and then I un-ticked shading and that fixed the problem. After this, I had to put all the vertexes and follow the line of lips and also to remember that it also covers the muscles that are around the mouth.
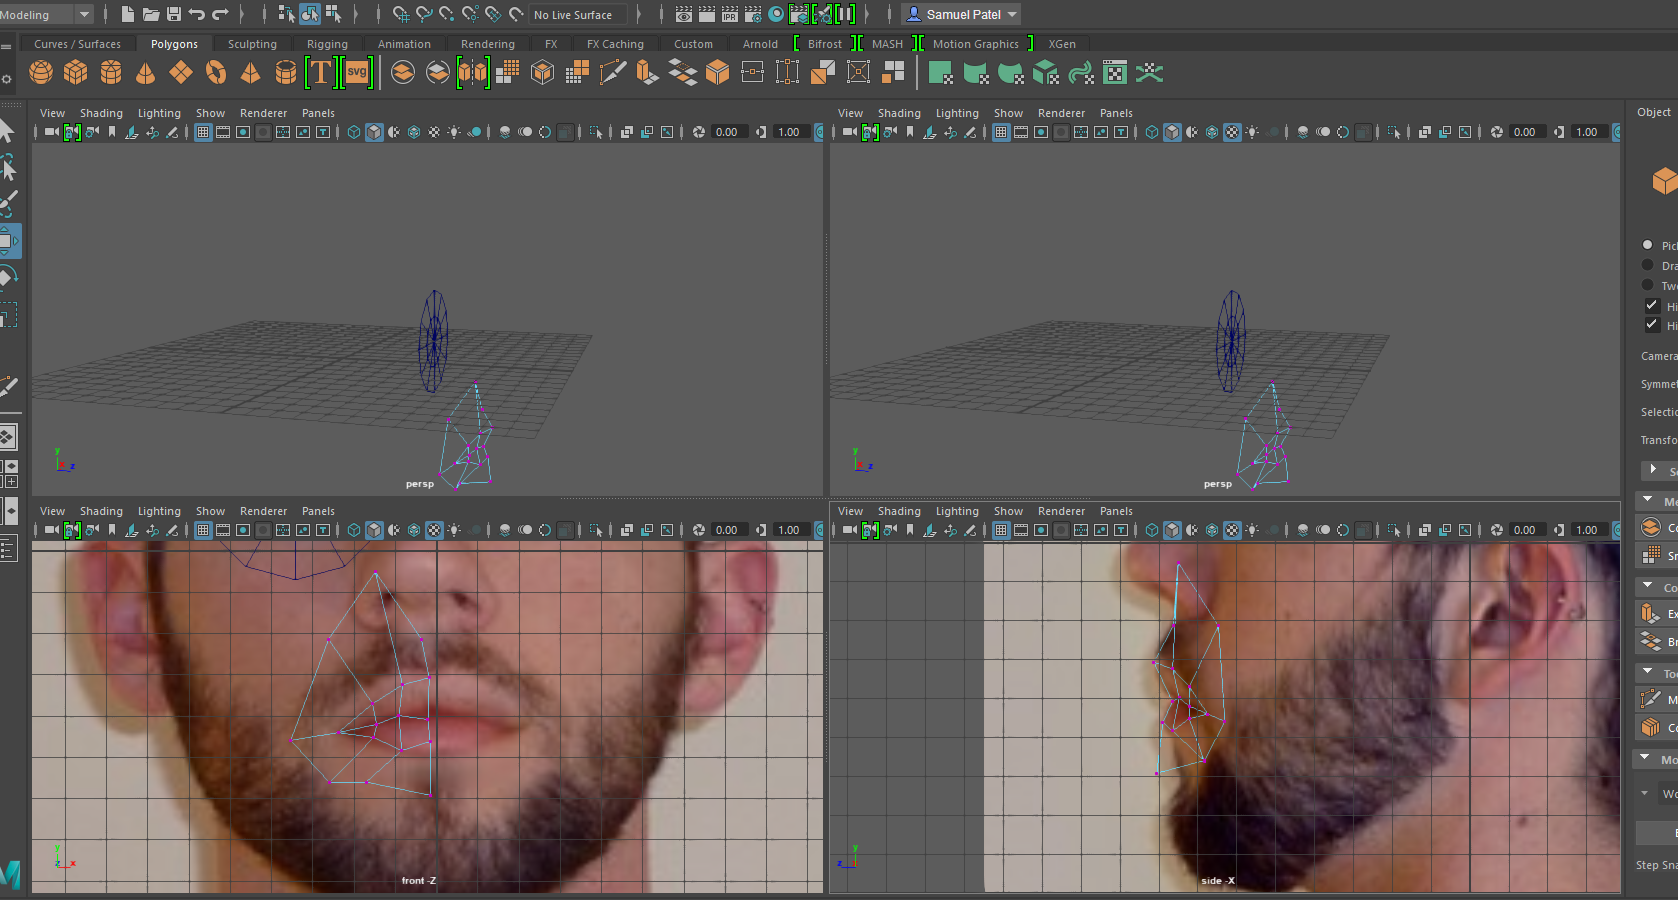
Once I created the mouth I started to create the eyes. After creating the mouth it was alot easier to understand how to model it. It was similar to creating the mouth because the production starts the same, to get a cylinder polygon. Once creating it I made sure to align it properly and to make it so that they other vertexes go where they should. For example, the outside of the eye goes inwards and if it wasn't inwards it would have looked flat. After that, I added edge-loops to give the eye more depth and detail. for the most inner part of the eye, I made that stick out so that it looks like it will start forming the bridge of the nose. After this, I did a duplicate special so that I could flip it and see if it resembles a mouth and eyes and to see if the topology matches properly.
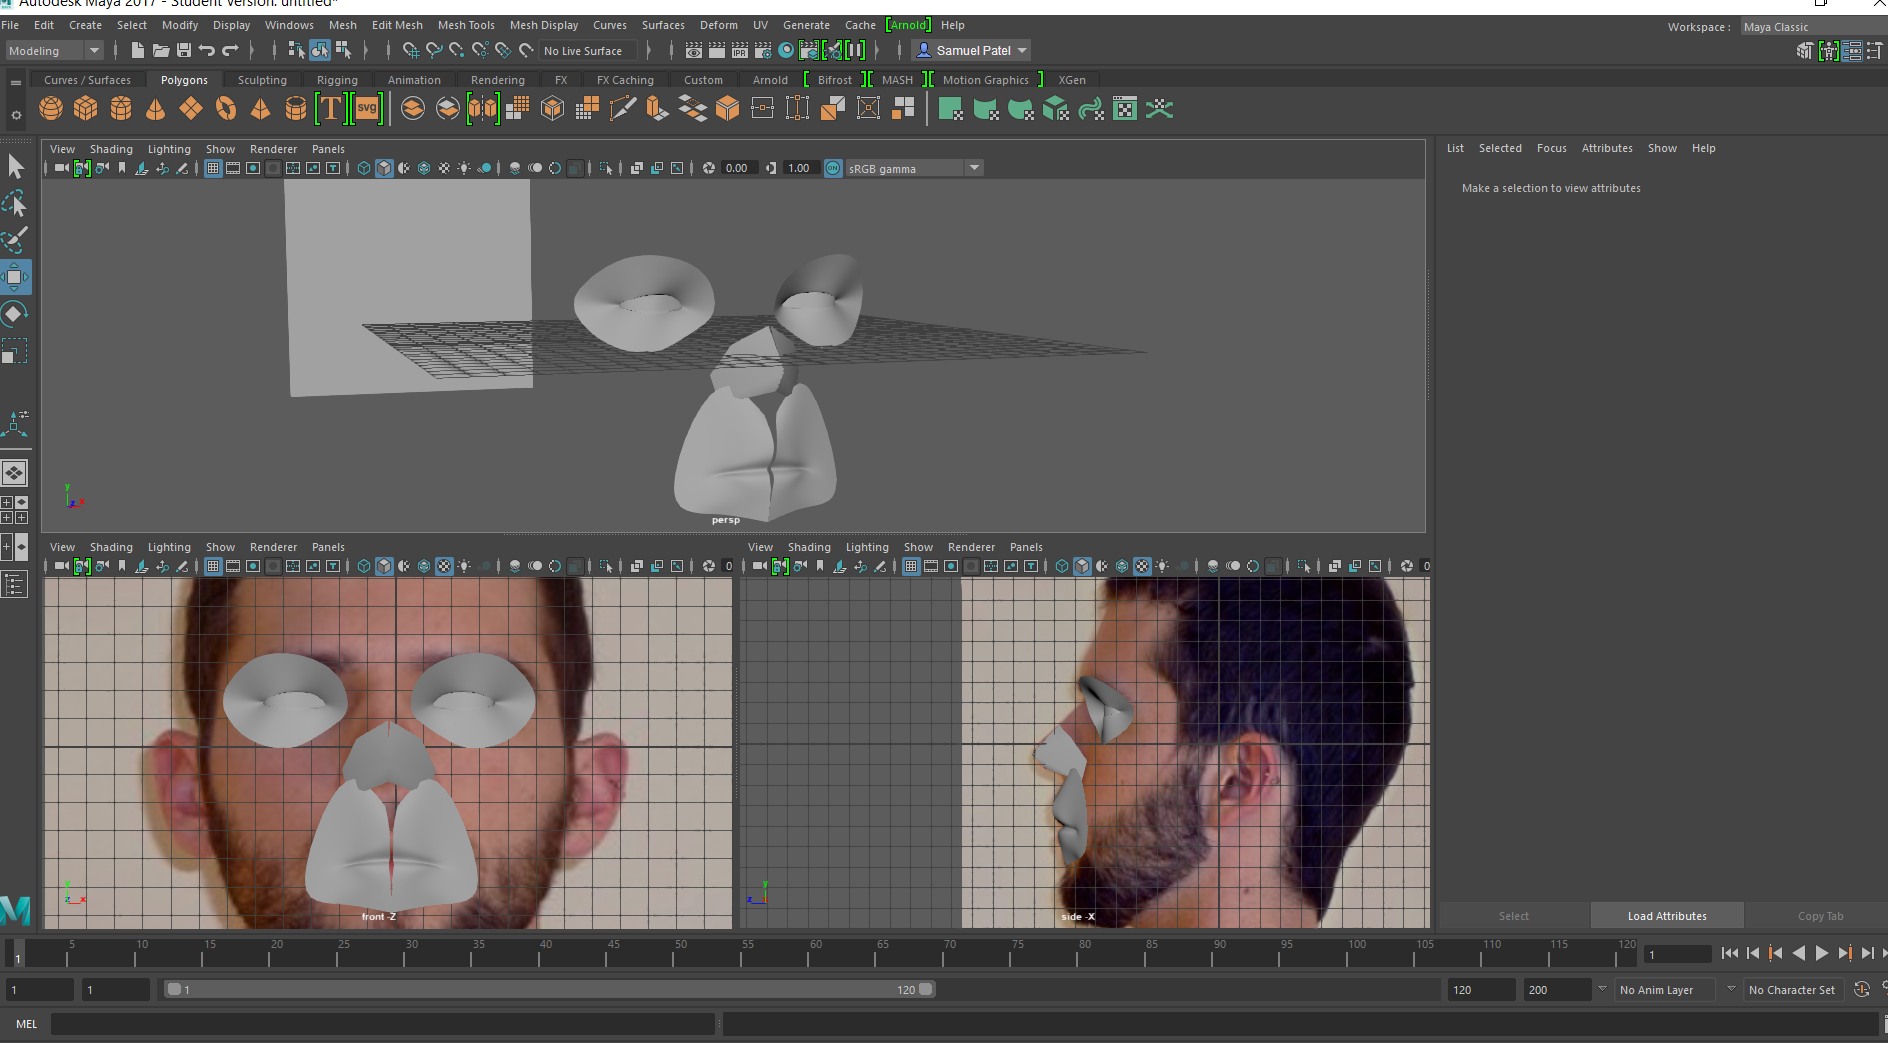
After this, I created the face shape. I created it by getting a sphere polygon and then changing the divisions and sub-divisions to 8. This allowed me to get a rough face shape. After that I changed the vectors to match the face. after that I move the vectors of the eyes and the mouth as well as the nose, to match the face so that they are all joint together. I felt like instead of make the features and then connecting it together I should have made it altogether connected instead.

After this I made a low polygon body, I did this by extruding a square and by adding some edge-loops. This was helpful because I was able to create neck using the multi-cut tool and then extrude it to get the neck shape. I found it pretty easy to create the body since it was a simple process of extruding and then moving the vertices to get the figure that I wanted for the character, by using this method I was able to give my character a lean figure and make his chest stick out a bit to give him a masculine lean figure. As well as for the arms I decided to just extrude them outwards and this gave me the arms although I need to make some adjustments since they are not the way I want them and they look like stubs.

After making the body I decided to start making the hands for the character and this I struggled with. Firstly I got a sphere, then create some cylinder polygons and it looked like sausages for fingers which were not the style I was going for since I wanted it to be pretty good when it came to detail. The hands would be the main focus of the first scene, so because I didn't know how to do it I watched a Youtube tutorial on how to. I started watching the video and it was roughly 30 minutes. I only watched 6 minutes and this was until I made the first finger. After that, I decided to delete the rest of the fingers and then made the one finger detailed to the way that I wanted it. Then I copied that one finger, then changed the size the for each finger example, the index finger to the pinky finger. For the thumb, I decided to extrude another finger on the hand and then I changed the vertices to make it look like a thumb. Problems that I face was when I was merging the fingers to the hand I had to make it so that they were really close to each other. And sometimes when they were not close enough, they would merge wrong and it would look like an hourglass. After doing that there would be some spare vectors or faces and then when I did attach them all I would delete the spare faces and vectors that were not needed.
Alex Cheparev. (9/11/15). Easy Hand Modeling Tutorial in Maya.Available: https://www.youtube.com/watch?v=vRchh9ye7TY&t=434s. Last accessed 22/02/18.

After this, I did a duplicate special that way I could use this to make the other right hand. And then I scaled it to -1.0000 this way I could have it so that it was flipped horizontally. I've used this tool a lot before so I knew how to use especially as I used it for the face, therefore, I can copy the other half and have a perfect topology for the model.

After I made all the required body parts for my character I decided to start putting it together. I decided to get rid of the arms from the body and make the arms for the hands. This was because the topology is different from the arms that were already made and the hands and this would have made it harder to attach. I made the arms from getting the edge of the hand and extruding it. I decided to make after it was done to the length that I was happy with I selected edges and expanded them the added depth to the arm. After When I created the arms I decided to make a hole where the others arms were on the body and this way I could merge the arms together. It took really long to do so what I did to speed up the process is I made I attached one arm and then deleted one half and duplicate special. After this, the next step that I had to do was to make sure that I textured the character and I started to do the texturing but it was a lot harder since everything was together so I had to do un-select, for example, the characters face I had to un-select the eye. So next time when I make a character I know that its a lot better to texture them before putting together that way it would have been easier.

After finishing the process of making the character merging and texturing, I decided that I would start by making a rig for the character and since in the first scene all you will see is his hand and maybe his top half. So I decided to make a rig that would allow his fingers and his arms to move. The thing is that the fingers only need to bend since they don't stretch out. I made joints for finger and thumb. I had 3 for every finger and thumb one for the tip, the next for the middle and the last one for the knuckle. For the Arm the joints were for the wrist, the elbow and the shoulder after this I decided to join on the chest this is because you can only have 1 joint connected to a mesh. So this allows both joints to be connected to the body. After this was made I skinned the joints so that I could use the joints to actually move the body and the way that I did this I wouldn't need paint weights since they are only being rotated and not stretched.


Unity

Each bit of code has to have; after it's finished this is to end that statement. The braces are to show which bits are code and which bits are not coded. The public float is a value that is public to all of the code but this can be changed if the public is changed to private. Void Start is what happens when the game starts and what the code should perform. The void update is what happens constantly and it keeps updating. The code If is conditional and if whatever the condition happens then it will do that, for example, X = X - Xforce; (keycode.A)) this means that if the A key is pressed then it will force the -Xforce which will make the object go left. The orange color digits are the values of the forces and determinants how much it does that force. For example, if the Xforce was higher the object would move a lot faster. The final brace shows that the code has ended.
Social Issues Animation

No comments:
Post a Comment